Introduction
Baking thin chicken breasts at 400°F is one of the quickest ways to achieve juicy, tender chicken that’s full of flavor. However, nailing the perfect cooking time can be a challenge. Bake them too long, and they dry out; bake them too little, and they remain undercooked. Knowing the right techniques for baking thin chicken breasts at 400°F can save you from these common pitfalls.
In this guide, we’ll cover everything you need to know about baking thin chicken breasts at 400°F. From understanding the factors that influence baking time to step-by-step instructions and common mistakes to avoid, you’ll learn how to perfect this popular method. Whether you’re new to the kitchen or a seasoned cook, this comprehensive guide will help you achieve consistently delicious results when baking thin chicken breasts at 400°F.
Factors Influencing Baking Time
Thickness of the Chicken Breasts
The thickness of chicken breasts plays a crucial role in determining how long they need to bake. Thin chicken breasts, generally less than 1 inch thick, bake more quickly, usually in 15-20 minutes at 400°F. However, thicker cuts take longer, often up to 25-30 minutes, depending on their size and density.
Why does thickness matter so much? Uneven pieces cook at different rates, which can leave one side dry and the other undercooked. To ensure uniform cooking, try slicing thicker chicken breasts horizontally or gently pounding them to an even thickness. Not only does this reduce cooking time, but it also allows seasonings to penetrate more deeply, giving you tastier results.
So, the next time you’re preparing chicken, don’t overlook this simple adjustment—it’s the secret to even cooking and great flavor.
Oven Accuracy and Preheating
Even if you follow recipes to the letter, an inaccurate oven can throw off the results. This is why oven temperature accuracy is critical when baking thin chicken breasts. If your oven is too hot, the chicken could dry out quickly. Conversely, if it’s too cool, you may end up with undercooked meat.
An easy fix? Use an oven thermometer to ensure the temperature is precise. Also, don’t forget to preheat your oven to 400°F before placing the chicken inside. Preheating allows the chicken to start cooking at a consistent temperature right away, which reduces variability in baking time and improves overall results.
For best practices, always double-check the temperature and preheat for at least 10 minutes—it’s a small step that makes a big difference.
Use of Foil or Baking Dish
The way you bake your chicken—whether uncovered on a baking sheet, wrapped in foil, or placed in a baking dish—can influence both baking time and texture. Baking thin chicken breasts uncovered promotes better browning and a lightly crisped exterior. This method is perfect if you love a golden, slightly caramelized finish.
On the other hand, using foil or a covered dish traps moisture, which can slightly reduce baking time while ensuring the meat stays juicy. This method is ideal if you’re prone to overcooking chicken or if you prefer a tender, melt-in-your-mouth texture.
To balance both methods, consider starting with foil for the first 10 minutes, then uncovering the chicken to finish baking. This way, you get the best of both worlds—moist chicken with a beautiful, golden exterior.
Recommended Baking Times
General Guidelines for Baking Thin Chicken Breasts at 400°F
When it comes to baking thin chicken breasts at 400°F, simplicity and precision are key. Thinly sliced, boneless, skinless chicken breasts—those measuring less than 1 inch thick—usually bake to perfection within 15-20 minutes. This relatively short baking time is ideal for achieving a tender and juicy texture while ensuring the chicken is fully cooked.
The high temperature of 400°F works wonders for both flavor and texture. It locks in moisture and allows the chicken to develop a subtle golden-brown exterior without drying out. However, it’s essential to remember that ovens can vary, so the exact baking time might slightly differ.
For foolproof results, always check your chicken early, around the 15-minute mark, and adjust as needed. Starting with evenly sized chicken breasts is a great way to ensure they bake consistently. Following these guidelines ensures a deliciously cooked chicken breast every single time.
Importance of Internal Temperature
Time is important, but the real measure of perfectly cooked chicken lies in its internal temperature. Regardless of how long it’s in the oven, ensuring that the chicken reaches an internal temperature of 165°F is absolutely crucial for food safety. This temperature eliminates any risk of harmful bacteria, like salmonella, while retaining the juicy texture of the chicken.
A meat thermometer is your best friend here. Insert it into the thickest part of the breast to get an accurate reading. Avoid eyeballing or relying solely on baking time, as this can lead to undercooked or overly dry results.
If you don’t have a thermometer, cut into the thickest part of the chicken. Properly cooked chicken will be white and opaque, with clear juices running out. It’s always better to double-check than to risk serving undercooked poultry.
Step-by-Step Baking Instructions
Preparing the Chicken Breasts
A little preparation goes a long way in achieving perfectly baked chicken. Ensuring the chicken breasts are uniform in thickness and well-seasoned is key to consistent cooking. With just a few steps, you can elevate your dish from ordinary to extraordinary.
Slicing and Pounding
When working with thin chicken breasts, even thickness is crucial. Uneven pieces cook inconsistently—some parts might overcook while others remain underdone. To avoid this, slice thicker chicken breasts horizontally. This not only reduces baking time but also helps the seasoning adhere more evenly.
For extra precision, use a meat mallet or rolling pin to gently pound the chicken to an even thickness. Place the chicken between two pieces of plastic wrap or wax paper to prevent mess. This simple step ensures uniform cooking and tender, juicy results.
Seasoning Options
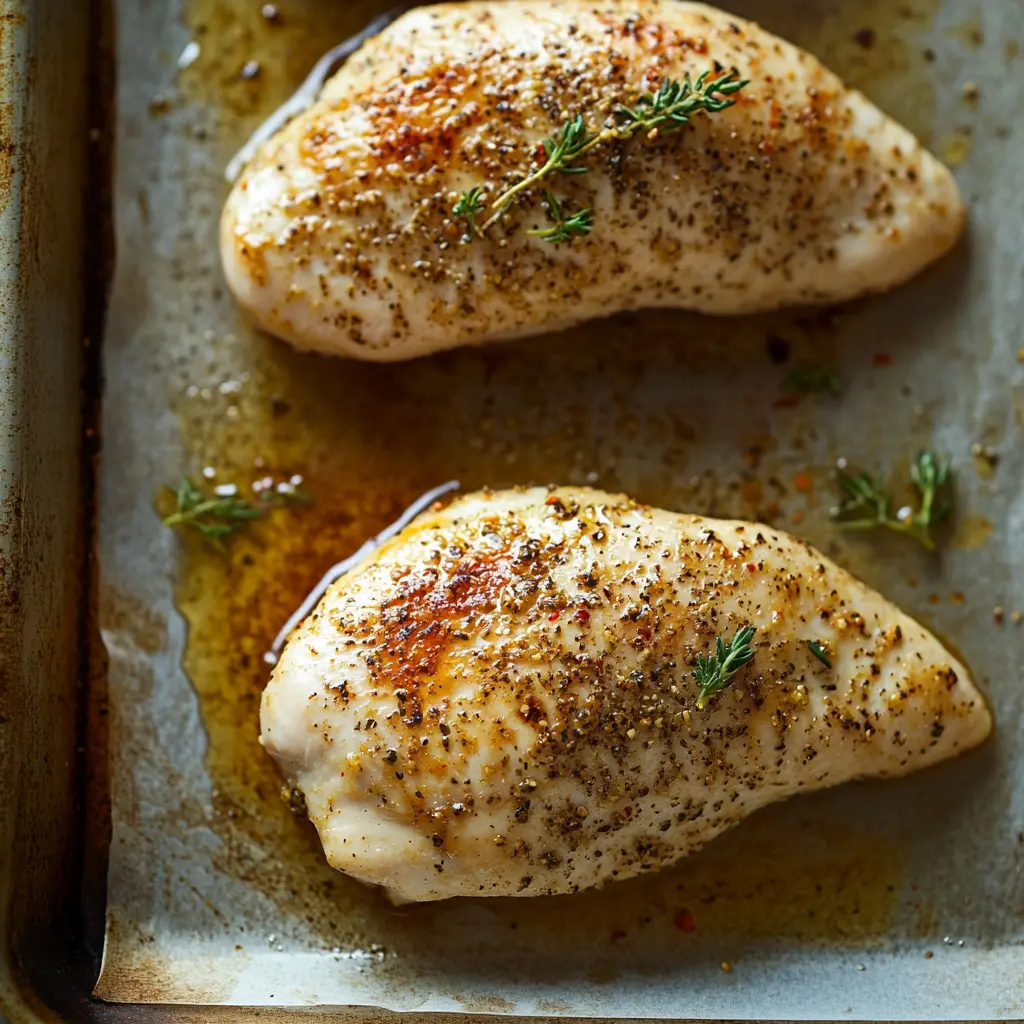
Seasoning is where you can let your creativity shine. Start with basics like salt and pepper for a clean, classic flavor. For more complexity, add garlic powder, paprika, onion powder, or Italian herbs.
If you’re feeling adventurous, marinate the chicken for 30 minutes to an hour before baking. A marinade of olive oil, lemon juice, garlic, and your favorite spices will infuse the chicken with robust flavor while keeping it moist. Remember, seasoning is not just for taste—it also helps create that delicious, golden exterior.
Baking Process
Once your chicken is prepped and seasoned, it’s time to bake. Following the right steps ensures your chicken comes out perfectly cooked every time.
Preheating the Oven
Before baking, preheat your oven to 400°F. This step is non-negotiable! Preheating ensures the chicken starts cooking immediately at the correct temperature, which helps it bake evenly. Allow at least 10 minutes for the oven to fully heat.
Arranging the Chicken on a Baking Sheet
Line a baking sheet with parchment paper for easy cleanup and to prevent sticking. Place the chicken breasts in a single layer, ensuring they don’t overlap. Overlapping pieces can lead to uneven cooking and soggy textures. Proper spacing allows heat to circulate evenly around each piece, producing the best results.
Monitoring Cooking Time and Temperature
Bake the chicken for 15-20 minutes, but keep a close eye on it, especially if your oven runs hot. Around the 15-minute mark, start checking the internal temperature using a meat thermometer. Insert the thermometer into the thickest part of the breast—it should read 165°F.
If the chicken hasn’t reached the proper temperature, continue baking in 2-minute intervals. Once done, remove it from the oven immediately to prevent overcooking. Let the chicken rest for 5 minutes before serving to allow the juices to redistribute.
Tips for Juicy and Flavorful Chicken
Marinating Tips for Baking Thin Chicken Breasts at 400°F
One of the best-kept secrets for juicy and flavorful chicken is marinating. Marinating not only infuses the chicken with mouthwatering flavors but also helps retain moisture during baking. A good marinade consists of three main components: an acid (like lemon juice or vinegar), a fat (like olive oil), and seasonings or spices.
For optimal results, marinate your thin chicken breasts for at least 30 minutes, but not more than 24 hours, as overly long marination can break down the proteins and affect texture. Simple combinations like garlic, soy sauce, honey, and olive oil work wonders for flavor. Or try a Mediterranean-inspired marinade with lemon, oregano, and garlic for a tangy, herbaceous twist.
While marinating, ensure the chicken is evenly coated. Use a resealable plastic bag or a shallow dish covered with plastic wrap. Don’t skip this step! It’s the quickest way to elevate your chicken from good to irresistible.
Why Resting Thin Chicken Breasts After Baking is Essential
After baking, don’t rush to serve your chicken. Allowing the cooked chicken to rest for 5 minutes is a critical step many overlook. Resting helps the juices redistribute throughout the meat, ensuring every bite is tender and moist.
When chicken comes out of the oven, its juices are concentrated in the center due to heat. If you slice it immediately, those flavorful juices will escape, leaving your chicken drier. Instead, tent the chicken loosely with foil and let it rest. This short pause not only improves texture but also enhances flavor.
Taking just a few minutes to rest your chicken makes all the difference, ensuring it’s as juicy and satisfying as possible.
Common Mistakes to Avoid
Overcooking the Chicken While You Bake Thin Chicken Breasts
Overcooking is one of the most common mistakes when you bake thin chicken breasts. Because these cuts are lean and cook quickly, leaving them in the oven too long can result in tough, dry chicken. Nobody wants to bite into overcooked, flavorless meat!
To avoid this, always adhere to the recommended baking times—15-20 minutes for thin chicken breasts at 400°F. Monitoring the internal temperature is also crucial. Use a meat thermometer to ensure the chicken reaches exactly 165°F, the safe cooking temperature. Remove the chicken from the oven promptly once it hits this mark.
Remember, chicken continues to cook slightly after being removed from the oven. This residual heat, also known as carryover cooking, can dry out your meat if you don’t account for it. Resting the chicken for five minutes after baking helps keep it moist and prevents overcooking.
Neglecting to Check Internal Temperature When You Bake Thin Chicken Breasts
When you bake thin chicken breasts, neglecting to check the internal temperature is a recipe for disaster. Thin chicken cooks fast, and guessing whether it’s done by its color or texture can lead to undercooked or unsafe food. Eating chicken that hasn’t reached the required internal temperature of 165°F can expose you to harmful bacteria, including salmonella.
Using a meat thermometer is the best way to check for doneness. Insert the probe into the thickest part of the chicken breast, avoiding the pan or baking sheet. This ensures an accurate reading and eliminates any guesswork.
By following these simple steps and avoiding common mistakes, you can safely and effectively bake thin chicken breasts that are moist, tender, and perfectly cooked.
Frequently Asked Questions
FAQs on Baking Thin Chicken Breasts at 400°F
Baking thin chicken breasts at 400°F is a quick and convenient way to prepare flavorful chicken, but it can raise some questions. Below, we address the most common concerns about this cooking method to ensure your results are perfect every time.
How can I ensure my chicken doesn’t dry out when baking thin chicken breasts at 400°F?
The key to preventing dryness when baking thin chicken breasts at 400°F is precise timing and moisture retention. Start by baking for the recommended 15-20 minutes, and always check the internal temperature early. A properly cooked chicken breast reaches 165°F without exceeding it.
Marinating the chicken beforehand is another great way to retain moisture and infuse flavor. Marinades with olive oil, citrus, or yogurt work wonderfully to protect the meat during the baking process. Finally, allowing the chicken to rest after baking helps lock in those juices, ensuring every bite is tender.
Is it better to bake thin chicken breasts at 400°F or 350°F?
For thin chicken breasts, baking at 400°F generally produces better results. The higher temperature ensures the chicken cooks faster, helping it retain its natural juices and develop a golden-brown exterior. On the other hand, baking at 350°F requires a longer cooking time, which increases the risk of dryness, especially for thin cuts.
That said, baking thin chicken breasts at 400°F demands close attention to time and temperature. Use a meat thermometer to check the internal temperature frequently and avoid overcooking. Following these steps guarantees flavorful and juicy chicken.
Should I cover thin chicken breasts with foil while baking at 400°F?
Covering thin chicken breasts at 400°F with foil can help retain moisture by trapping steam, making it an excellent option for those who prioritize tender, juicy meat. This technique is especially useful if you’re worried about overcooking or if your chicken tends to dry out.
However, covering the chicken can limit browning. For a crispy and golden exterior, bake the chicken uncovered or use a combination approach: cover the chicken with foil for the first 10 minutes, then remove it for the remaining time. This method strikes the perfect balance between moisture and texture.
Conclusion
Mastering the Art of Baking Thin Chicken Breasts at 400°F
Mastering how to bake thin chicken breasts at 400°F isn’t as tricky as it might seem. With a little attention to detail and a few simple steps, you can consistently achieve juicy, flavorful, and perfectly cooked chicken.
Understanding key factors, such as the thickness of the chicken, proper oven preheating, and using a meat thermometer, makes all the difference. Uniform thickness ensures even cooking, while precise baking times—typically 15-20 minutes for thin chicken breasts—prevent overcooking or dryness. Always aim for an internal temperature of 165°F for safety and ideal texture.
Enhancing the flavor is equally important. Marinating your chicken adds depth, while resting it after baking locks in moisture and ensures every bite is tender. Whether you choose to cover the chicken for extra juiciness or bake uncovered for a golden finish, the process is adaptable to your preferences.
By avoiding common mistakes like overcooking or neglecting to check the internal temperature, you’ll elevate your cooking skills in no time. With these tips and techniques, you can confidently bake thin chicken breasts at 400°F for meals that impress every time.